 11:16:00 AM
 tutorial_mania
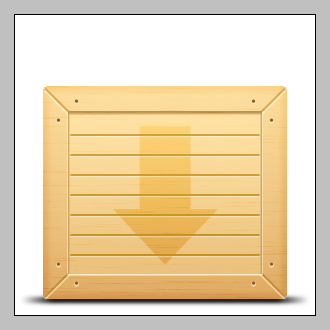
How To Design a 3D Wooden Box in Photoshop

Step 1: Create a New Document
Create a new 300×300 px white backgrounded document in Photoshop.You can change the size of document if you want but keep the height to width ratio same (1:1).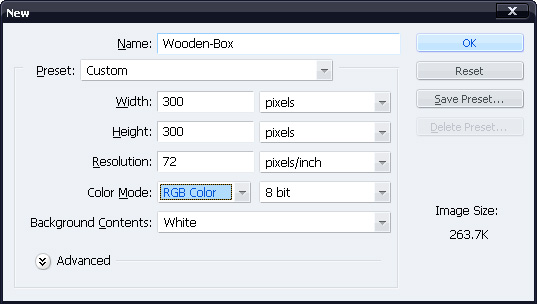
Tip
Use layer-sets for putting a group of layers together that you’d want to move/resize alt at a time.With layer-sets, the tedious work of selection of multiple layers for moving/resizing can be avoided.Step 2: Create Front-Face
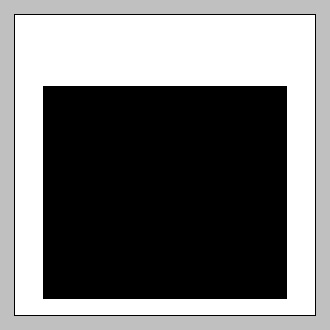
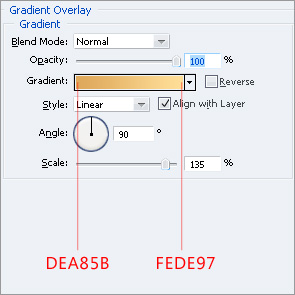
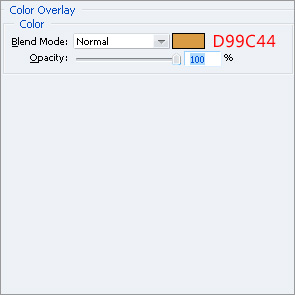
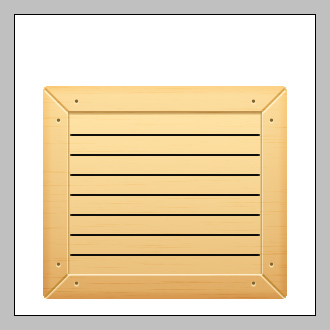
Create a new layer-set (name it "Front-Face").Within the layer-set, create a new layer (name it "Front") ,select Rectangular Marquee Tool and fill with black a selection like the one shown below.
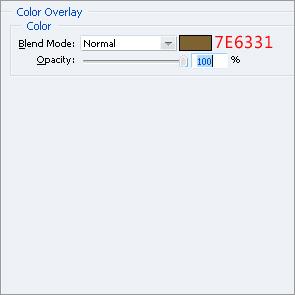
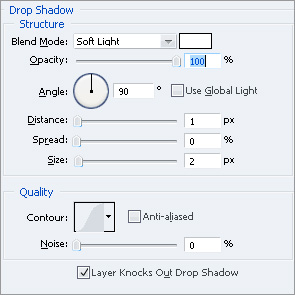
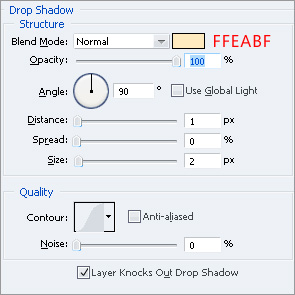
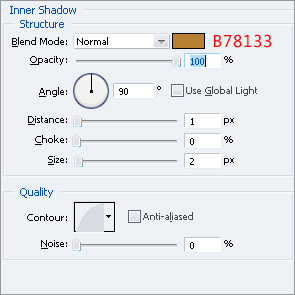
Go to Layer>>Layer Style>>Blending Options and make these settings:
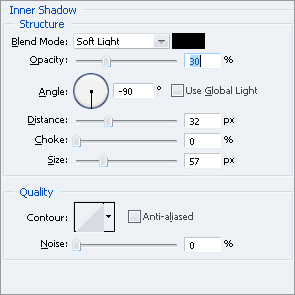
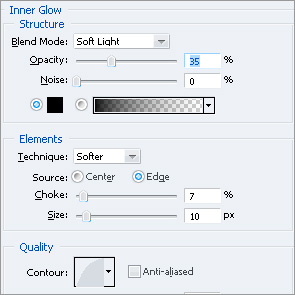
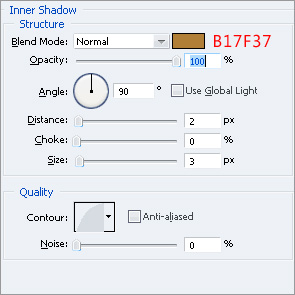
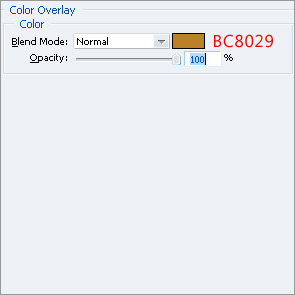
Ctrl+Click on the layer and go to Select>>Modify>>Contract , enter 25px and click OK, create a new layer (name it "Front-Etch") and fill the selection with black.Go to Blending Options of this newly created layer and make these settings:

Step 3: Create the Wood Texture
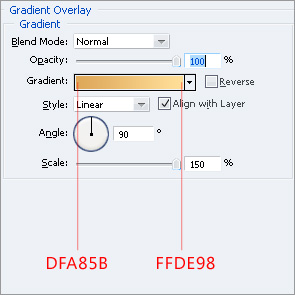
Create a new layer (name it "Texture") and fill it with white.Go to Filter>>Noise>>Add Noise and make these settings: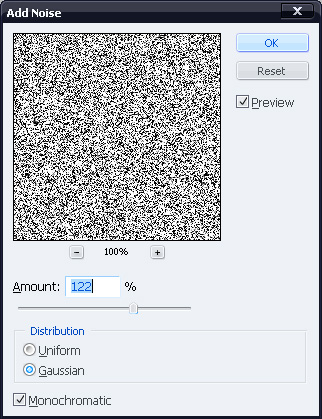
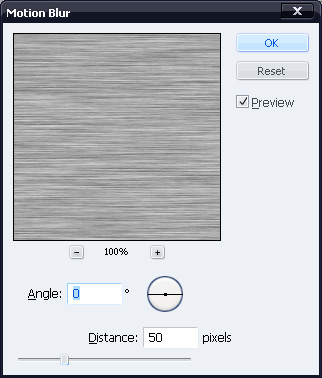
Now go to Filter>>Blur>>Motion Blur and put these figures:
With "Texture" layer selected, Ctrl+Click on the "Front" layer, press Ctrl+Shift+I and hit Delete.By doing so, the part of texture overflowing "Front" layer will be cleared.
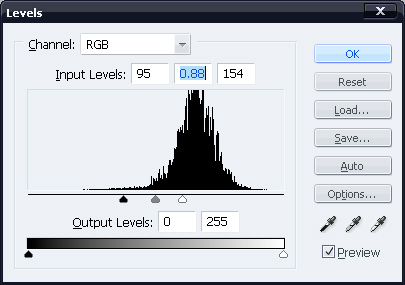
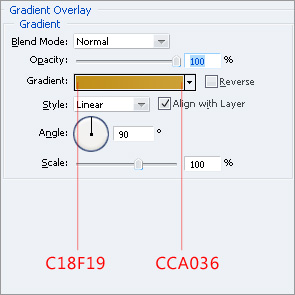
With the layer still selected, press Ctrl+L and make these settings:
Step 4: Add details to Front-Face
Create a new layer (name it "Line") and with Rectangular Marquee Tool, fill a 2px thick vertical selection of any length, like the one shown below:
You might notice that the duplicated layer doesn’t fit in colors down there as it does at top.To fix this, go to its Blending Options and edit these settings:

Step 5: Add further details to Front-Face
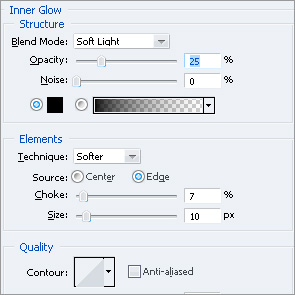
Select the Shape Tool and draw a very small circle anywhere on the canvas.Go to it’s Blending Options and make these settings: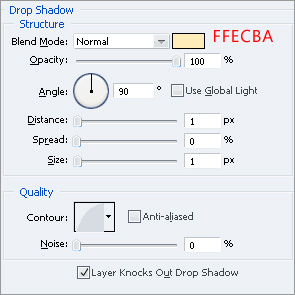
Step 6: Add Arrow to Front-Face
Using Pen Tool ,make an arrow shape like this:Step 7: Add Shadow to the Base
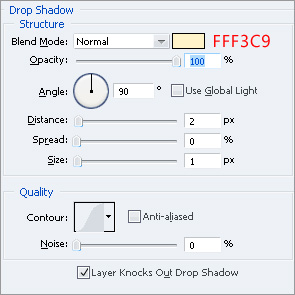
Create a layer (name it "Shadow") and place it below all other layers in layers palette.Fill a 6px thick selection with black slightly wider than front-face.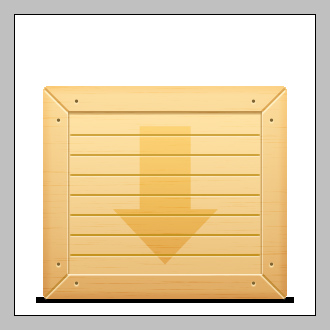
Angle=0
Distance=30px.
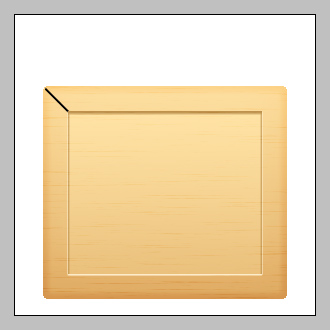
You’ll have something like this by now:
Step 8: Create Upper-Face
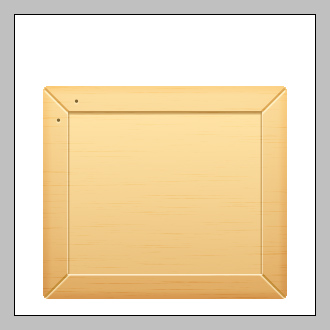
Create a new layer-set (name it "Upper-Face"), create a new layer (named as "Up") and fill a rectangular selection with black, as shown: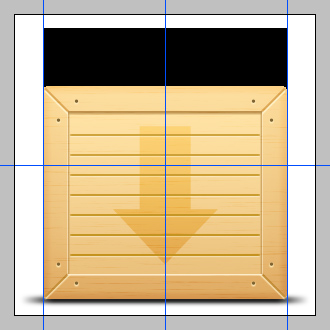


Step 9. Add Wood Texture to Upper-Face
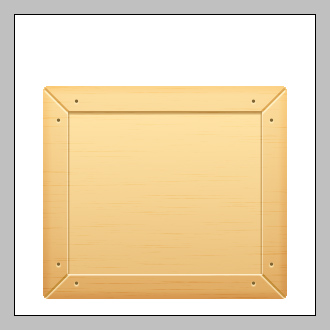
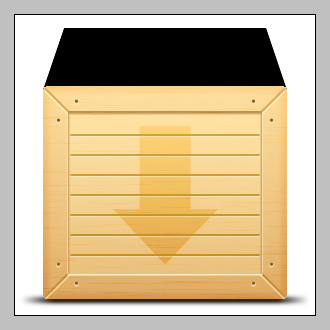
Duplicate the "Texture" layer from "Front-Face" layer-set and move it to "Upper-Face" layer-set.Put it above the two layers in the set.Clear the part of the "Texture" layer that overflows "Up" layer.You’ll obtain something like this by now: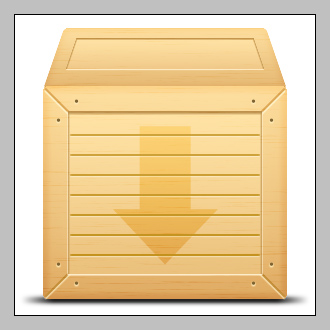
10. Add details to upper face:
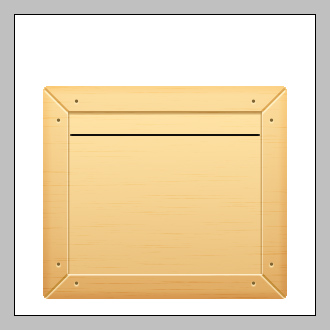
Add ridges,lines and nails like you did on the "Front-Face" while using same styles to get something like this: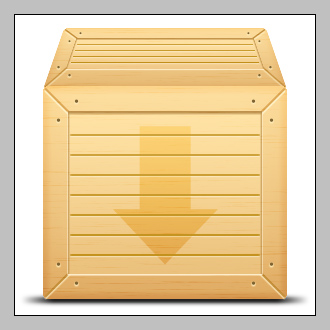
Step 11. Final adjustments
For any final adjustment, click on "Front-Face" layer-set and go to Layer>>New Adjustment Layer>>Levels, choose settings that please you.In addition to levels, I added a "Color-Balance" layer and came up with this:

 Posted in
Photoshop
Posted in
Photoshop


0 comments:
Post a Comment