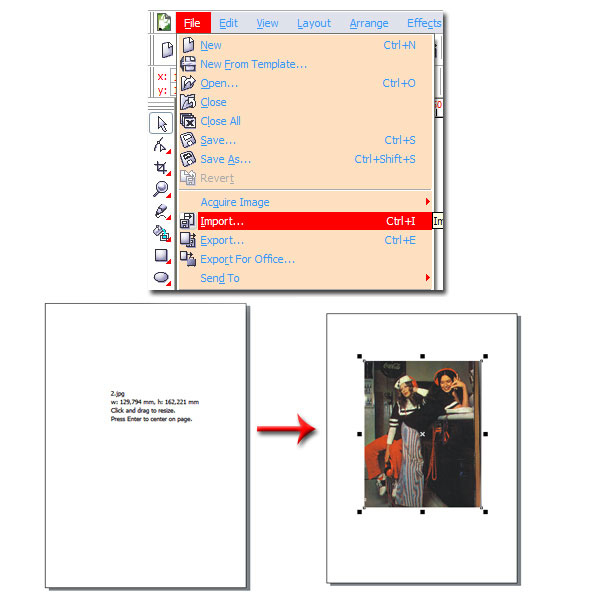
Step 1
The first thing you need to do is import the image you want to vectorize. Search high and low on stock sites, magazines, or take your photo to use for this tutorial.
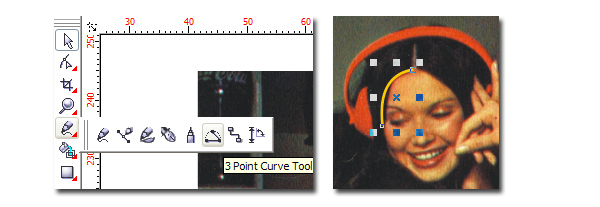
Step 2
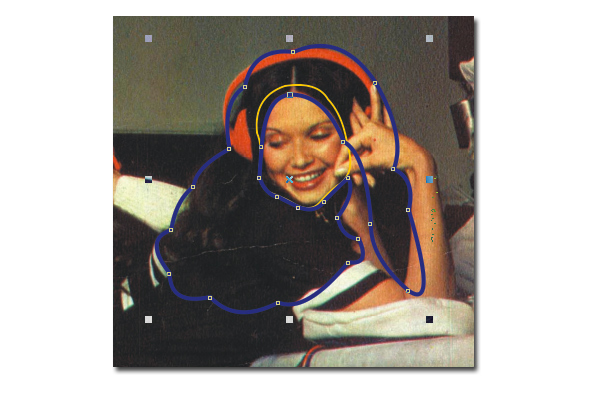
Then, select the 3 Point Curve Tool, and start to draw the shape you want. Then select the width and color you want to give to the line (double-click on outline color at the bottom right). I recommend to make it a bit thick and in a bright color, to make it more easy to work with.
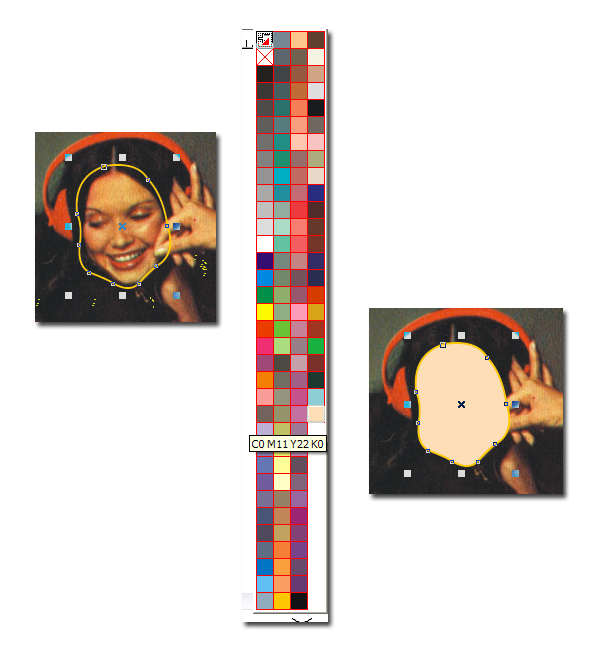
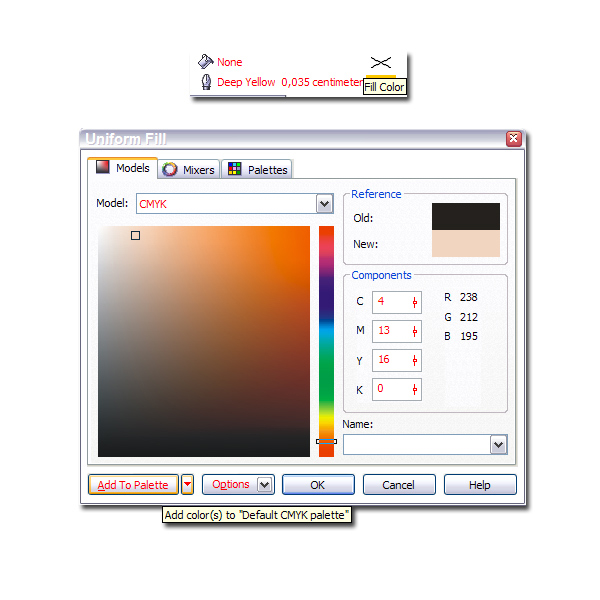
When you finish the shape, go to the Color Palette and click on the color you want to fill it with. If you can’t find the color you want, you can make your own blend and add it to the palette (double-click on fill color at the bottom right). In some cases, you click on the color you want and the shape won’t fill. This occurs because the path it’s not closed, remember that in order to paint shapes with Corel, they always have to be closed ones. To close your shape go to Arrange > Close Path > Closest Nodes…(at the top-left and towards the middle).
Step 3
Continue to draw as many closed shapes as you want until you complete the image structure. I recommend that you draw every closed shape in a different color to avoid confusing them, since most of them appear intersected. It’s also convenient to leave every shape unfilled until you’ve finished drawing them, this way you can draw the inner elements later (in this case, I left the faces unfilled so I could draw the eyes later).
Step 4
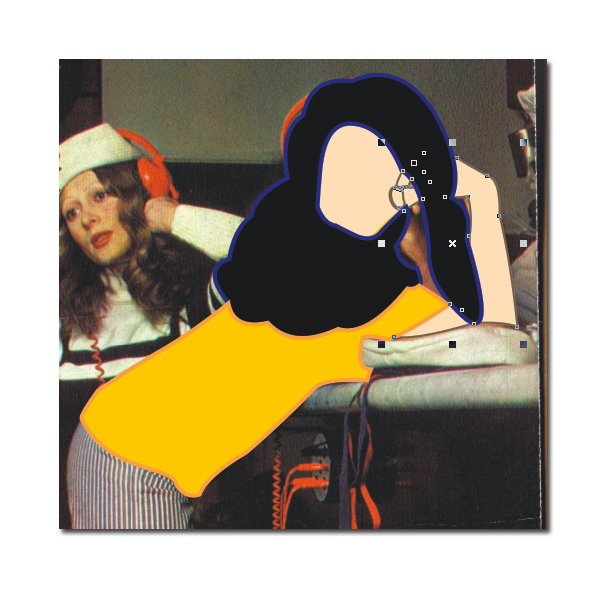
When you have all the shapes that you want, it often happens that one shape ends up behind or in front another shape, and it should be the opposite, like in the picture below.
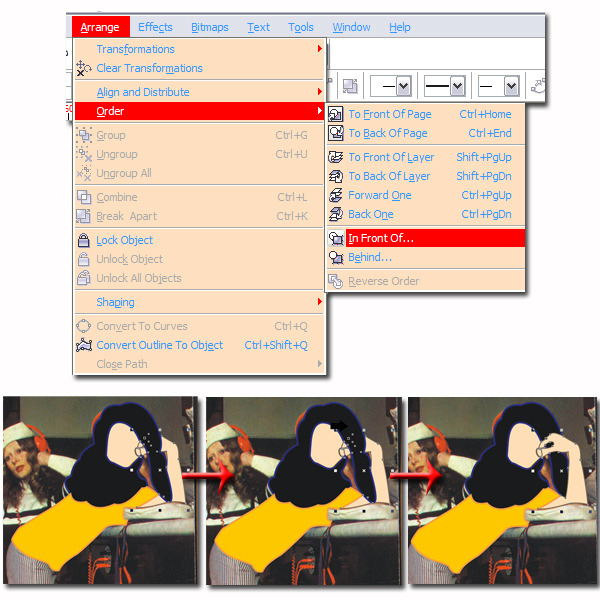
In this case, select the shape you want to move, then click on Arrange > Order > In Front Of. Next, a black arrow will appear on the screen, click on the shape you want your other shape to move towards to. Once finished, put the right color line in all the shapes.
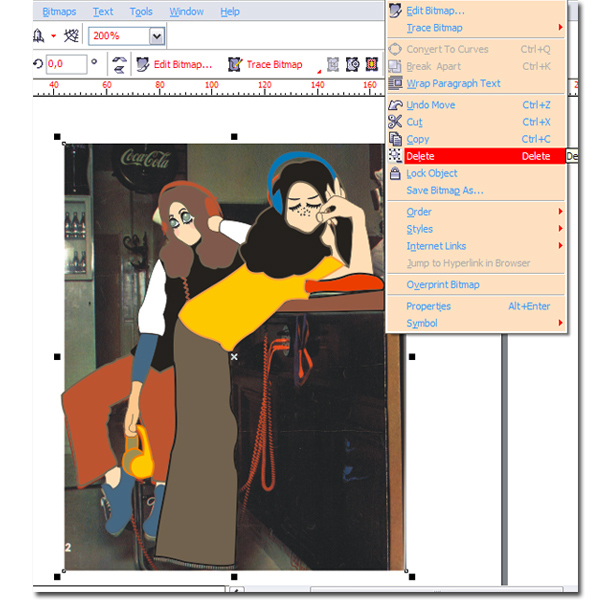
Step 5
Once you finished all your basic shapes, delete the image you are vectorizing (select the image, right-click, and delete).
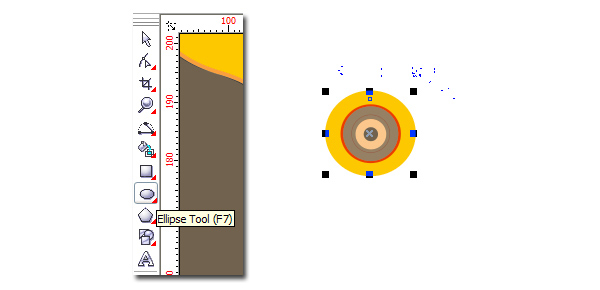
Step 6
Let’s make the flowers now. Select the Ellipse Tool and draw circles with different line values, line colors and different fillings. This will be the center of the flower.
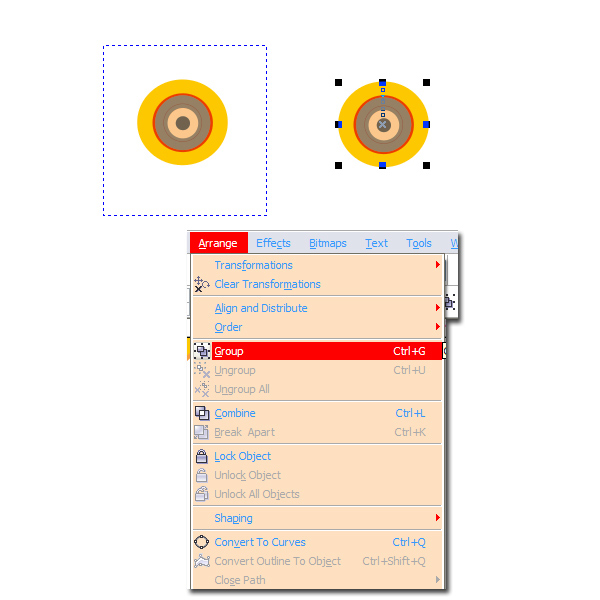
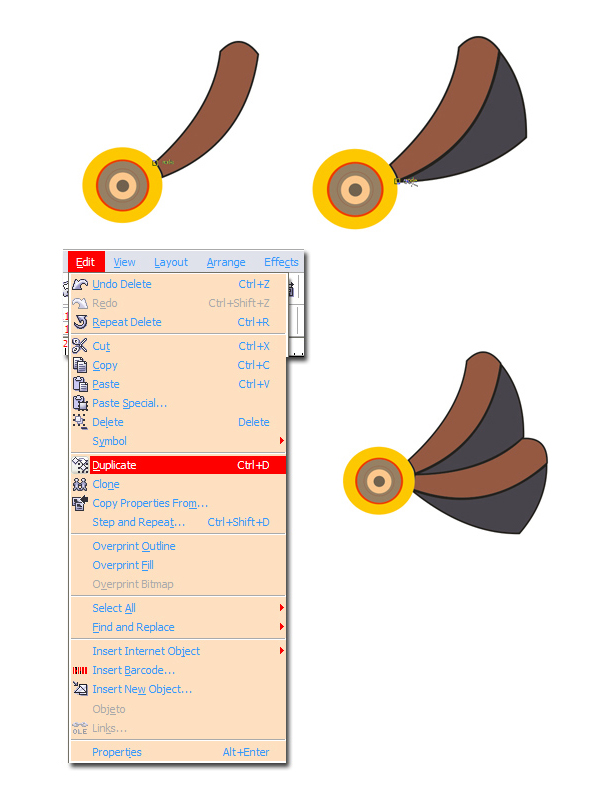
Select all the circles with the mouse (or click on each one while pressing Shift), then click on Arrange > Group (Command + G) This way you can move all the circles together – as if they were one element.
For the petals draw them around the center circle so they fit with it. Use the 3 Point Curve Tool to draw them. Once you have the two principal petals, group them and duplicate them (click on Edit > Duplicate or Command + D. Repeat this until you complete the whole flower. Once you have the flower, select all the elements in it and group them to make your work easier. Then duplicate the flower as many times as you want and position as shown below, or form a unique composition.
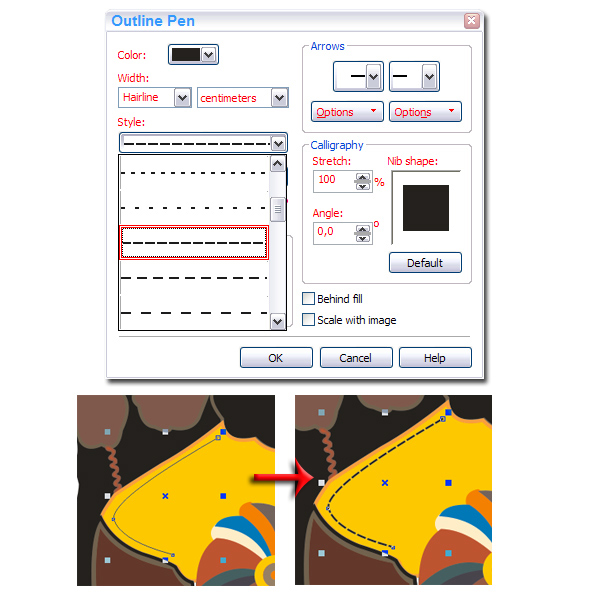
Step 7
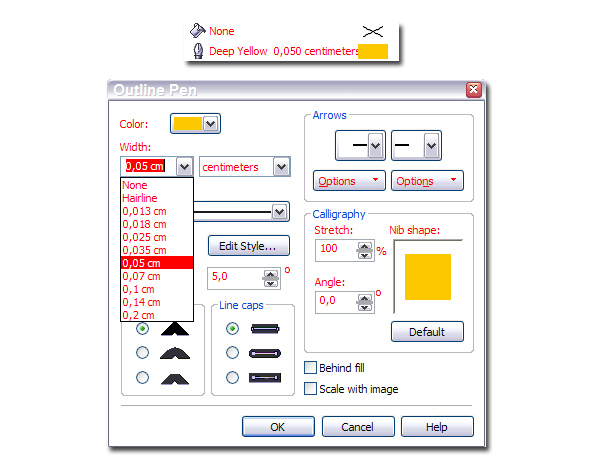
To make the stitches draw inside the closed shapes with the 3 Point Curve Tool. In this case, you don’t need to close the shapes since we’re not going to fill them. Double-click on the Outline Pen, then chose the line style, color, and width.
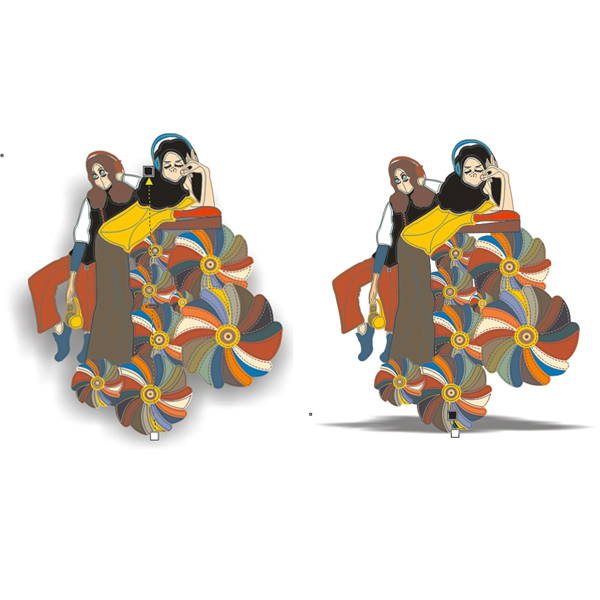
Step 8
Now we’ll make the shadow. First, group all the elements. Next, click on the Interactive Drop Shadow Tool and move the squares up or down until you get the kind of shadow you want. To pick the shadow characteristics go to the top-right.
Final Image
The final image is below. Experiment with your own source images, repeating geometric shapes, and placement of inner dash styled lines. While this image was created in Corel Draw, you could certainly make an image like this in your favorite vector program. I hope you enjoyed this tutorial and have fun creating!
 8:51:00 AM
 tutorial_mania


 Posted in
corel draw
Posted in
corel draw


0 comments:
Post a Comment