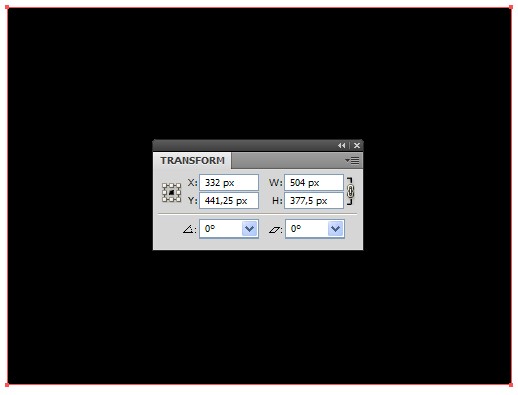
Step 1
Open a new document, pick the Rectangle tool (M) and create a rectangle at the size 504 px by 377,5 px, and fill with a black color.
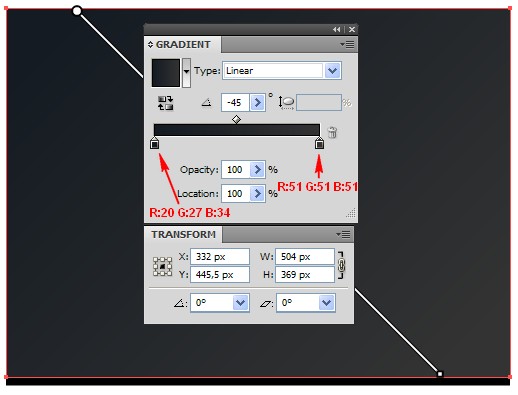
Step 2
Copy the rectangle you just created using Command + C followed by Command + F. Grab the Selection Tool (V) and decrease the copy’s size a little bit at the bottom part and fill with a Linear Gradient. To do this, open the Gradient Panel (Command + F9) and select type: Linear. You need two Gradient Sliders. For the first one from left to right select color: R=20, G=27, B=34 and for the second Gradient Slider apply R=51, G=51, B=51.
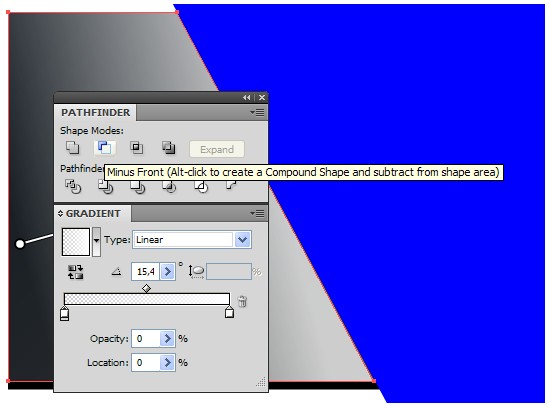
Step 3
Copy the rectangle you filled with a Linear Gradient using Command + C followed by Command + F. Use the Pen tool (P) to create a shape over the copy as shown. Now select the copy and the shape you created, open the Pathfinder Panel (Shift + Command + F9), click on the button Minus Front and fill with a Linear Gradient. You need two Gradient Sliders. For both of them select a white color, as for the first slider reduce the Opacity to 0.%.
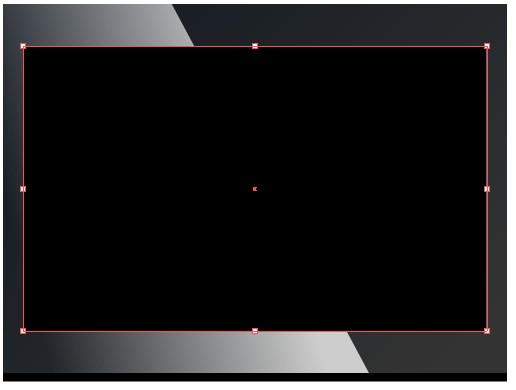
Step 4
Copy the shape you just filled with a Linear Gradient in Step 2 using Command + C followed by Command + F. Now move the rectangle over all others by going to Object > Arrange > Bring To Front (Shift + Command + Right Bracket key).
Change the Fill color to black. Grab the Selection Tool (V), click on the bottom or top part in the middle of the rectangle, hold and press the Alt key and slide it a bit inwards. This way you’ll reduce the top and bottom part uniformly. Repeat the same action for the side part, have a look at the picture below to get a better idea.
Step 5
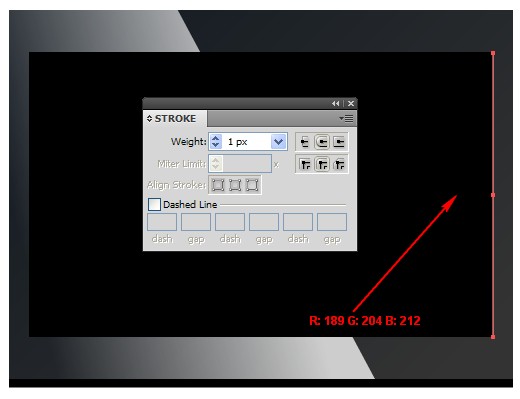
Copy the rectangle you just created and fill it with a black color using Command + C followed by Command + F. Grab the Direct Selection Tool (A) and delete the top and bottom left point of the rectangle by clicking on one point, then press the Delete key. Repeat the same action for the other left point, turn off the Fill color and apply a Stroke color of R=189, G=204, B=212 with a Weight of 1px.
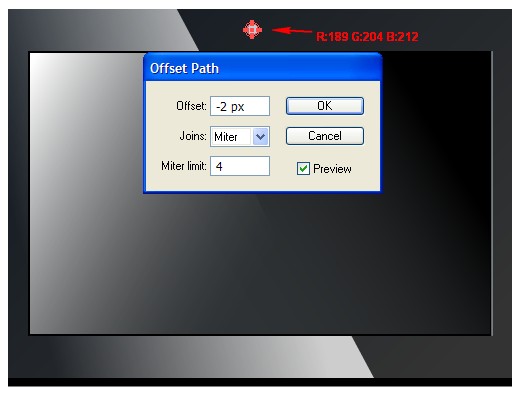
Step 6
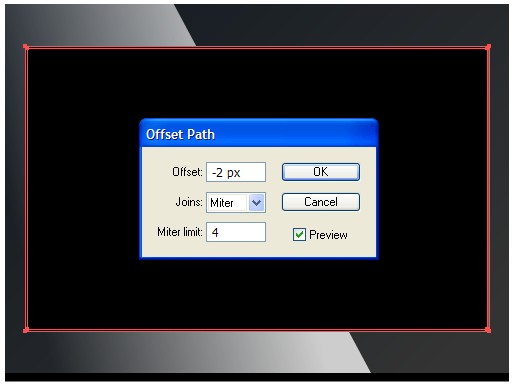
Now select the rectangle from Step 4 that you filled with a black color, then go to Object > Path > Offset Path in the new opening window. Now set the Offset to -2px and click OK.
Step 7
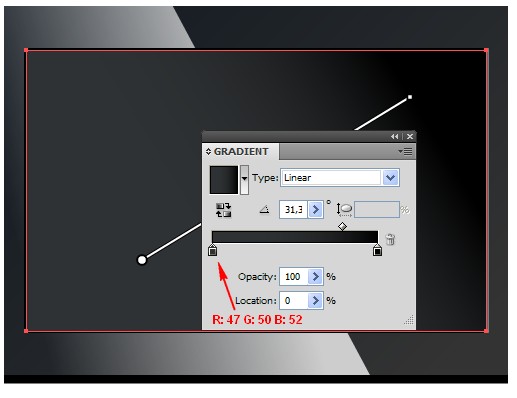
Fill the rectangle you created in Step 6 with a Linear Gradient after applying the Offset. To do this, open the Gradient Panel (Command + F9). You need two Gradient Sliders. For the first one from left to right select color: R=47, G=50, B=52 and for the second one select a black color.
Step 8
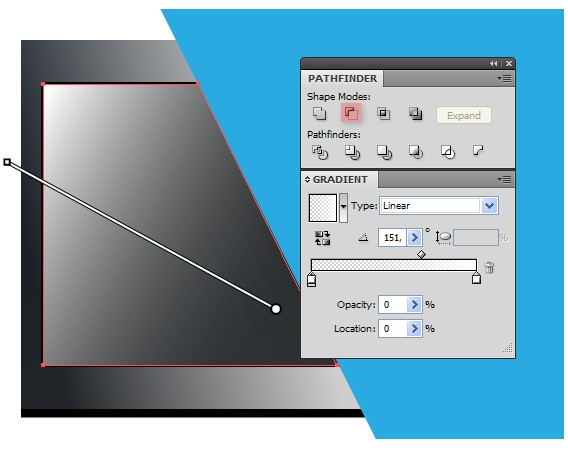
Copy the last created rectangle you filled with a Linear Gradient in Step 7 using Command + C followed by Command + F. Create a shape in a position like the one shown below. Open the Pathfinder panel and click on Minus Front. Fill the newly created shape with Linear Gradients. For both Gradient Sliders select a white color, then reduce the Opacity to 0% for the first Gradient Slider.
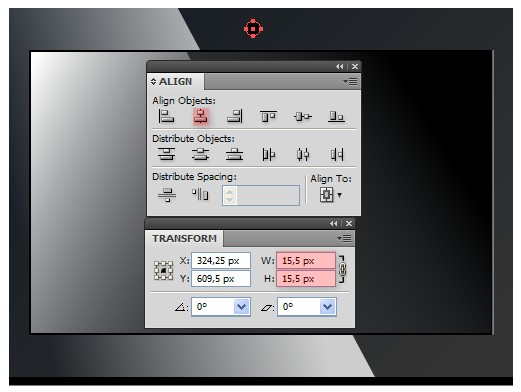
Step 9
Now let’s create the webcam on the laptop. Pick the Ellipse Tool (L), create a circle in a position with sizes 16px/16px as showed on the picture below and fill it with black color.
Step 10
As the circle is still selected, go to Object > Path > Offset Path, set the Offset to -2px, click OK and fill with the color: R=189, G=204, B=212.
 Posted in
corel draw
Posted in
corel draw
 10:07:00 PM
 tutorial_mania


0 comments:
Post a Comment