 |
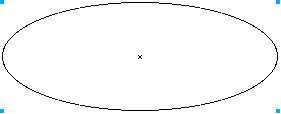
| 1) Start by drawing an ellipse of any size in your document. Then go into Keyline mode so you can see the center point of the ellipse. |
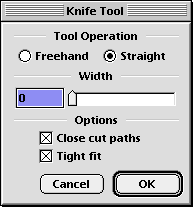 |
| 2) Next you want to set up the Knife tool. Double click on the Knife tool so you see the above dialog box. Select the Straight option, and set the Width to 0. Lastly make sure the option Close cut paths is turned on. |
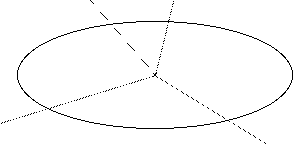 |
| 3) Now before you do any cutting, make sure you know what percentages you want to divide the ellipse into. It's good to kind of draw it out on paper first to get an idea what would look the best. Above I drew a few lines to show where I'm going to cut, and placed them on the Background layer. |
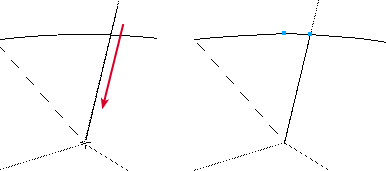 |
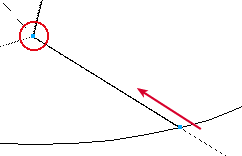
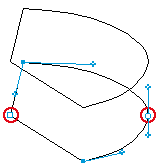
| 4) Now select the ellipse, and choose the Knife tool. The first cut will be on the top of the ellipse. Using the lines in the background as your guide, cut across the ellipse starting on the outside to the inside ending at the center point of the ellipse (example zoomed in slightly). This creates a closed path where you cut into the ellipse shown above at right. What the path actually is, is a curve point that doubles-back onto itself giving the illusion of a straight line. You can't select the end of the line because of this. Go ahead and play with the cut point a little by stretching out the curve handles to see what I mean. Just make sure you Undo any playing before you continue. |
 | |||
| 5) This next step is very crucial to making this work correctly. It can sometimes be frustrating but once you get the hang of it, you'll be making Pie Charts in no time. While the ellipse is still selected, make another cut similar to how you did above on the bottom. Only this time, make sure you end the cut in the exact same spot as the first cut. It may help to zoom in on the intersection area to get the cut exact.
|
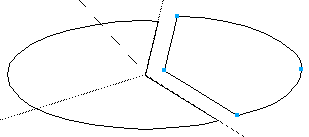 |
| 5b) Try testing to see if the cutting worked for you by deselecting the ellipse and choosing the new cut shape and pulling it away from the Pie. If you get the whole ellipse shape, then Undo and try Step 5 again until you see something like above. |
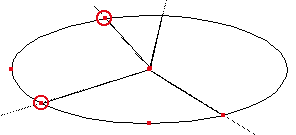 |
| 6) Repeat Step 5 for the remaining cut areas like the above highlighted areas. Again, if you get the error message I noted above, keep trying, you'll eventually get it to cut. |
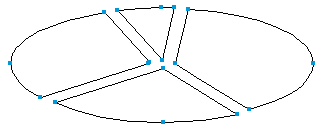 |
| 6b) Again, test the shapes to make sure they cut correctly by pulling them apart. You should now have a bunch of Pie slice like above. |
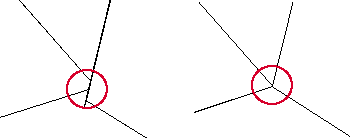 |
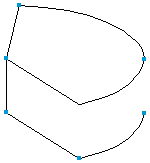
| 7) Clean up the center area by zooming in on the intersection spot. You may notice irregular points like above at left. Just reshape or remove unneeded points to make them pointy again like above at right. This may also include retracting any curve handles via the Inspector palette. |
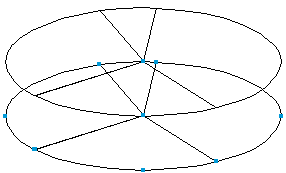 |
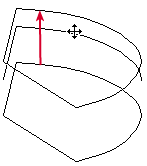
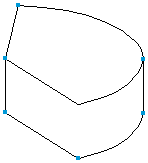
| 8) Now we're going to add a touch of 3D realism to this Pie Chart. First select all the shapes and Clone them. While the clones are still selected, move them down about an inch or so. To make this easier to deal with I'll show you how to make one piece of the 3D Pie Chart first. I made a new layer and hid all but one piece of the Pie on that layer. You can do the same if you like. |
|
|
|
|
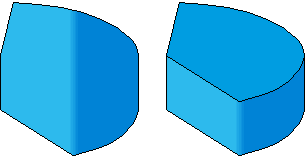 |
| 13) Now fill the piece in with some color. Here I used a Multi-Gradient fill. Select this piece and send it to the back to reveal the top part of the shape. Then fill in the top part with the same color. |
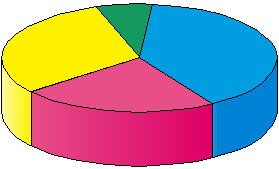 |
| 14) Repeat Steps 9-12 for the remaining slices of the Pie Chart. If all went smoothly, you should now have a Pie Chart ready to go like the above example. |
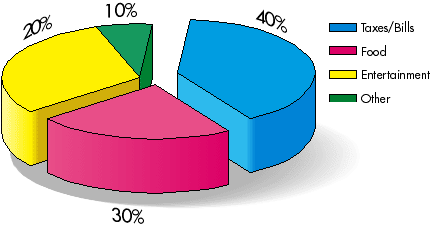 |
| 15) Now you can add the final touches to the chart. Because you made each object a separate 3D element, you can pull them away from each other to make it more jazzy. Add a drop shadow (a simple blend) and make the text wrap around an ellipse to give more depth to the chart |
 10:45:00 AM
 tutorial_mania
 Posted in


0 comments:
Post a Comment