Render Layers
Unlike display layers, render layers only affect rendering. Render layers can render specific elements of a rendering. They could render each object individually, render only the specular (shine of a model), or render diffuser, etc. One model can be assigned to as many layers as needed. Also, render layers can have a different render software for each layer. Example: Rendering with Mental Ray on one layer, and on another layer Maya Software would be rendering. The stacking order is important. We'll explain that later.
Creating A New Render Layer
Step one - Go to display>UI elements>channel box/layer editor.
Step two - In the channel box, go to layers view and check Render.
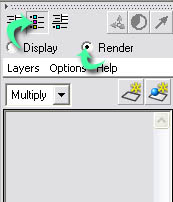
Step three - Go to layers>create empty layer.
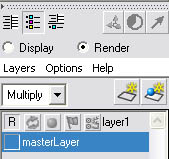
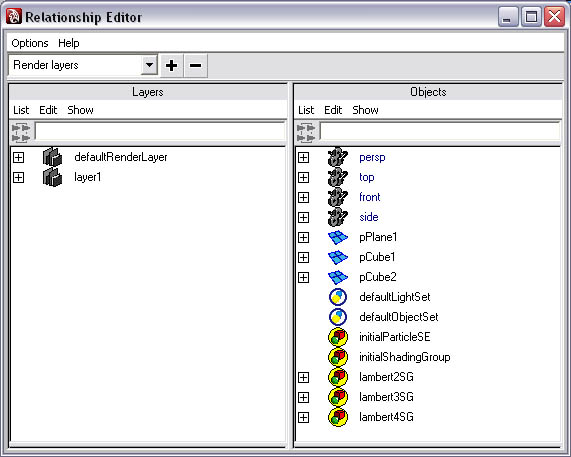
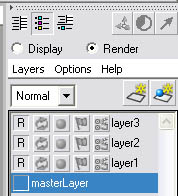
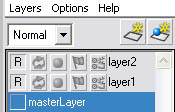
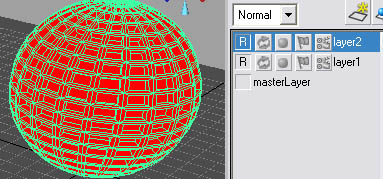
It appears that two layers are created, but they're not. Layer 1 is the actual layer that's created. Master Layer is the global scene layer, in other words all geometry is assigned to this layer unless otherwise assigned to another one.
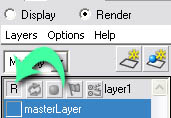
If you were to render the scene right now, it would appear black. That's because Layer 1 is the only renderable layer; Master Layer is not renderable.
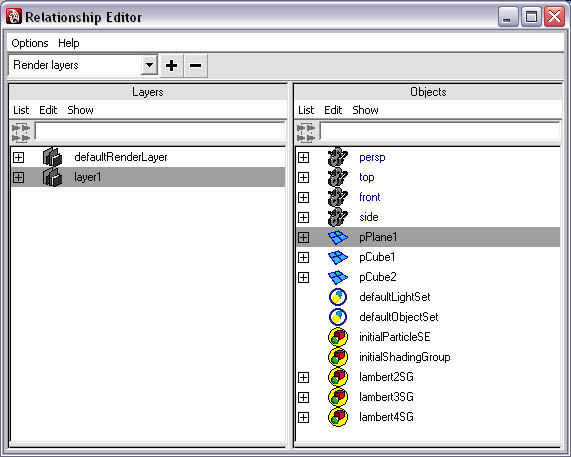
Select the floor plane and select Layer 1.
Everything appears to disappear. That's because there's nothing assigned to Layer 1. Also notice that at the bottom of the viewport it says persp(layer1).
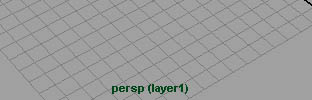
This helps tell us that the current layer is Layer 1. Now right click on the layer and go to add selected objects.
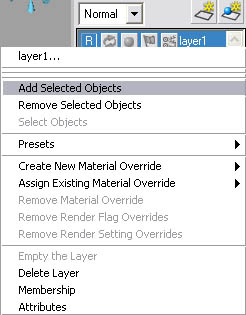
Now our floor plane is assigned to the layer and we can see them again. There's another way of doing this. In the layers editor, go to layers>membership.
Select Layer 1 on the left, and, on the right, select the geometry you want to assign to the layer.
This yields the same result as the right click menu.
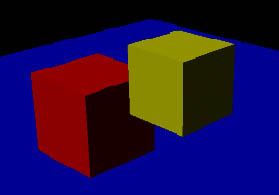
Go back to the masterLayer and select the yellow cube. It is important to make the yellow cube's layer first. This ensures our layers are stacked correctly. Once again we'll explain this later. In the layers editor, go to layer>create layer from selected.
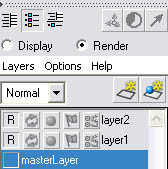
This creates layer 2, and layer 2 automatically has the yellow cube assigned to it. This is a faster way of doing what we did above. Now repeat this with the red cube.
Stacking Order
Take a quick test render. You should notice a blink when rendering.
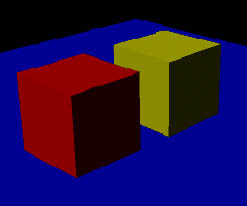
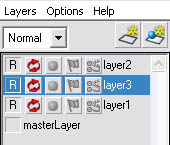
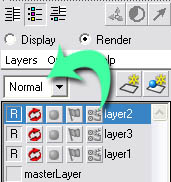
Now we're going to change the stacking order. Select layer 3.
Middle mouse button drag and drop it onto layer 2. This will put it in layer 2's position and move layer 2 up.
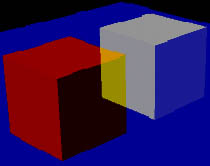
Now render.
As you can see, that's very wrong. This happens because, when working with layers, each object is rendered completely. Therefore objects in the background belong on the bottom layers and objects in the foreground belong on top layers.
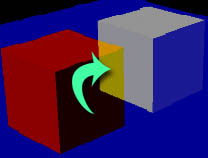
Select layer 2.
Notice the normal tab. We can change the way these layers "blend" when rendered. Set it to screen. Now render.
Notice how, where the red and yellow intersect, the red cube becomes yellow.
This is the same type of blending commonly found in 2d image editing programs, such as Photoshop.
Overrides
With layer 2 still selected, go to window>rendering editors>render settings. Notice how it says layer 2 on the window.
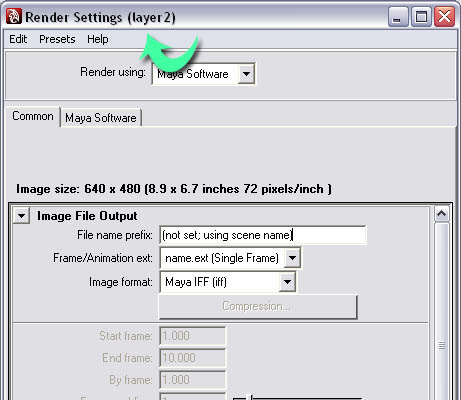
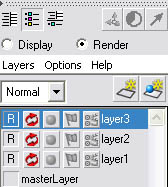
We're going to make a layer override. Right click on render using and select create layer override.
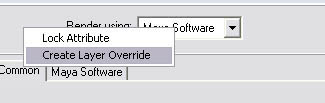
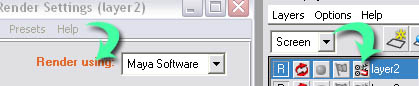
Notice how when we created the layer override the text turns orange and in the layers editor the rendering icon is highlighted.
Now set the "render using" to Mental Ray. Now layers 1 and 3 (floor plane, red cube) are rendered using Maya Software, and layer 2 is rendered with Mental Ray.
Materials And Layers
When you're working on a specific layer, if you assign a new material to an object in the layer, that material will only be added on that layer. Other layers will still have their old material.
Step one - Download and open
material.mb. Set the shelf to rendering.
Step two - In the layers editor, go to layer>create layer from selected. Repeat this once. Now we have two layers and they both have the same object assigned to them.
Step three - Select layer 2, select your model, create a new Lambert material from the rendering shelf.
Now go back to layer 1. As you can see, layer 1 still has the red Lambert applied.
Layer Attributes
Render layers have options so you can render only a specific element. Example: shadows, specular, color, etc.
Step one - Download
attributes.mb.
Step two - There's already been a layer created and the model and lighting assigned to it. Select layer 1 and go to layers>attributes.
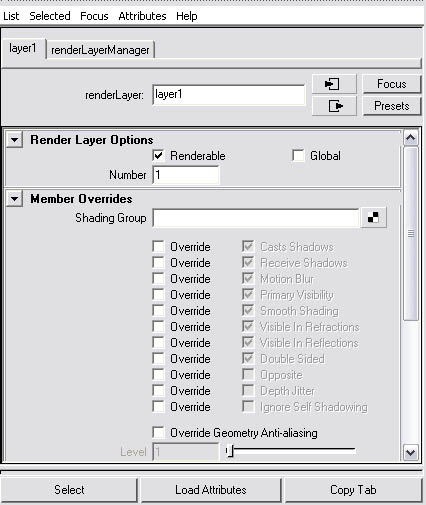
Step three - That opened the attributes editor with the layer loaded in it. Roll down to render pass options.

Now let's explain. The beauty pass means render everything (color, specular, shadows, etc.). We can uncheck this and render each item individually. So if we unchecked beauty and checked all the other options, we'd get the same result. The Maya render view can't show each option individually, so you have to use a batch render. This batch render will want to render to a layered psd file so we can open it in Photoshop and see each sub-layer (more on that later).
Step four - Check all but beauty.

Layered PSD
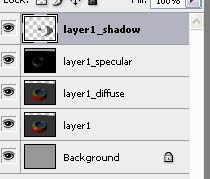
This allows Maya to export layered Photoshop files of the final rendering that can be opened in Photoshop. We can see each render layer individually in the Photoshop file. Also we can see sub-layers.
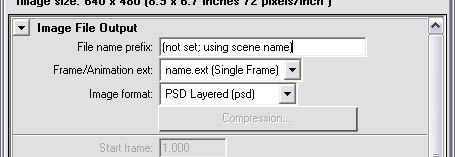
Step one - Go to window>rendering editors>render settings. Set the image format to PSD Layered (psd).
Step two - Go to render>batch render. This will render the psd file and save it on your hard drive.
Step three - Open your copy of Photoshop.
Step four - Open your file. It should be located in my documents\Maya\projects\default\images\attributes.psd.
Step five - All the sub-layers to make up the rendering are named layer name_value.
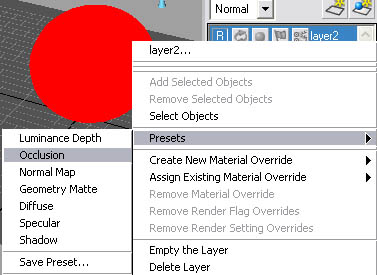
Presets
Maya has a set of presets that you can use for creating specific effects. Example: occlusion.
Step one - Download
last.mb.
Step two - This file contains a sphere that's been assigned to two render layers. It has a surface shader assigned to it; a surface shader doesn't have any shading.
Step three - Right click on layer 2 and go to presets. For this example we'll using occlusion (if you don't know what occlusion is, read this tutorial). What this preset does is, it sets the rendering software for this layer to Mental Ray and sets a material override to material that has occlusion assigned to the color of the material. The material override lets you have every object on that layer have the same material.
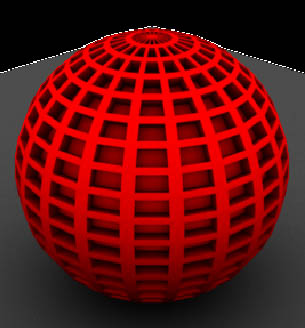
Step four - Take a quick test render. It renders the red sphere, then, overtop of it, renders occlusion. Occlusion is supposed to multiply the color, so, back in the layer editor, set layer 2's blend option to multiply. Now render. This yields the right result.
 11:36:00 AM
 tutorial_mania
 Posted in
Maya 3D
Posted in
Maya 3D


2 comments:
tertarik sih blajar grafis, tapi ni blog inggrisan, gak faham...
ga masalah,,,ntar tanya di comment aja...
insya alloh aq bisa bantu,,,
ajak teman2 bwt belajar grafis,,,
Post a Comment