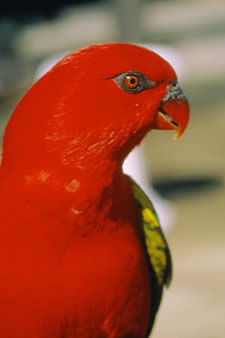
Step 1. Open an image to begin
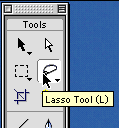
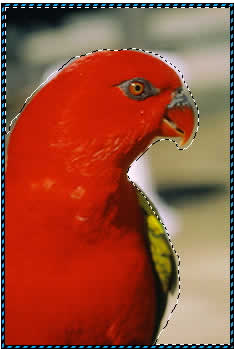
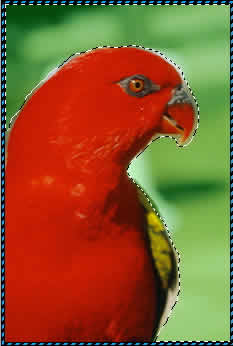
Step 2. Use one of the Marquee Selection Tools to make a selection around the area you want to compress. Usually an area with very little detail or an area away from the focal point.
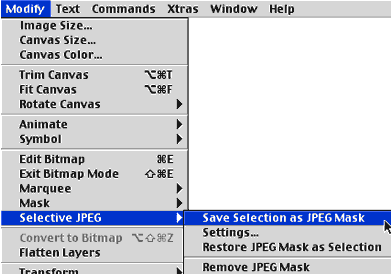
Step 3. Next, make the selection a Selective Mask by going to Modify>Selective JPEG>Save Selection as JPEG Mask.
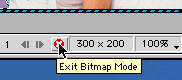
Step 4. You can see the masking because it has changed color. Go ahead and click Exit Bitmap Mode by clicking the Red Circle with the X in it or pressing the Escape Key.
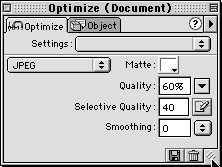
Step 5. Next, select the Optimize palette. If it's not visible, go to Window>Optimize to bring it up.
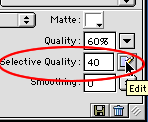
Step 6. Now, you're already familiar with the Quality button as that's what 's always been used to optimize your images. The new feature is the Selective Quality right below it. That is what you will use to optimize the area you masked out earlier.
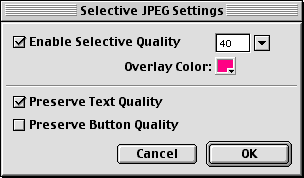
Go ahead and click the Selective Quality icon to bring up the dialog box.
You can experiment with the settings here but don't be afraid to bring the quality way down. Since the area you're compressing here is not the focal point of your image, it's OK to bring the quality down here.
Preserve Text and Button Quality options are helpful when you are optimizing graphics part of a navigation bar or menu.
You can also change the overlay color here by clicking the color swatch.
Step 7. As you work with different compression settings, be sure to Preview your settings using the preview window or by clicking your F12 key to Preview In Browser.
Step 8. You can also modify your Selective JPEG by going to Modify>Selective JPEG>Restore JPEG Mask as Selection. Your masked selection will be highlighted again.
 12:54:00 PM
 tutorial_mania
 Posted in
Fireworks
Posted in
Fireworks


0 comments:
Post a Comment